In this post I’ll show you the exact steps I use to run OpenClaw on Android by installing Ubuntu inside Termux (no root), then launching the OpenClaw Gateway and chatting with it from WhatsApp, Telegram, or Discord.
What is OpenClaw?
OpenClaw is a self‑hosted agent framework with a Gateway that connects large language models to your chat channels and tools. You can talk to it through WhatsApp, Telegram, Discord (and more) and have it act on your behalf – run tools, read/write files (where allowed), and other “skills.” Historically you may have seen the project or forks referred to as Clawdbot or Moltbot; modern docs and installs use the OpenClaw name.
My use case
I use it to analyze APKs I send over WhatsApp, make calls, read notifications, take photos, send SMS, and more via Termux APIs, see the video below.
Termux:API exposes almost every Android hardware feature to the terminal, except of Accessibility services that would allow us to interact with other apps:
- Battery
- Camera
- Microphone
- Notifications & UI
- Wi-Fi / Cell / Telephony
- SMS
- Contacts
- GPS
- Infrared
- Storage
- USB
- Fingerprint
- Audio / Vibration
- TTS
- Torch
- Wallpaper
- Job scheduling
So far, it has limitations, I can’t yet control other apps’ UIs (e.g., reply to Instagram or read calendar). Response time is decent. I’m using Gemini CLI via OAuth (free tier) as my default model path.
I have tested it on OnePlus 7 Pro (Android 10), OnePlus 7T Pro (Android 11). and Pixel 8 (Android 14).
Prerequisites (no root)
Android phone, Termux, Termux:API apps from F‑Droid (not from Google Play).
The one‑command installer
I followed Sagar Tamang’s guide and then wrapped all the steps in one script to make it as easy as possible. If you want to read Sagar’s original tutorial first, it’s here: Running OpenClaw Locally on Android: The Bionic Bypass.
Installation steps:
- Install
wgetandopensslto download installation script:pkg install -y wget openssl
- Download and run installer:
wget https://github.com/androidmalware/OpenClaw_Termux/blob/main/install_openclaw_termux.shchmod +x install_openclaw_termux.sh./install_openclaw_termux.sh
What it does: installs Ubuntu via proot-distro, enters Ubuntu, installs Node 22 + OpenClaw, runs openclaw onboard, and starts the Gateway. The process take couple of minutes. The script was generated using Copilot and tested.
OpenClaw initialization
The script first starts initialization of OpenClaw, where you select model and service you want to use for sending messages.
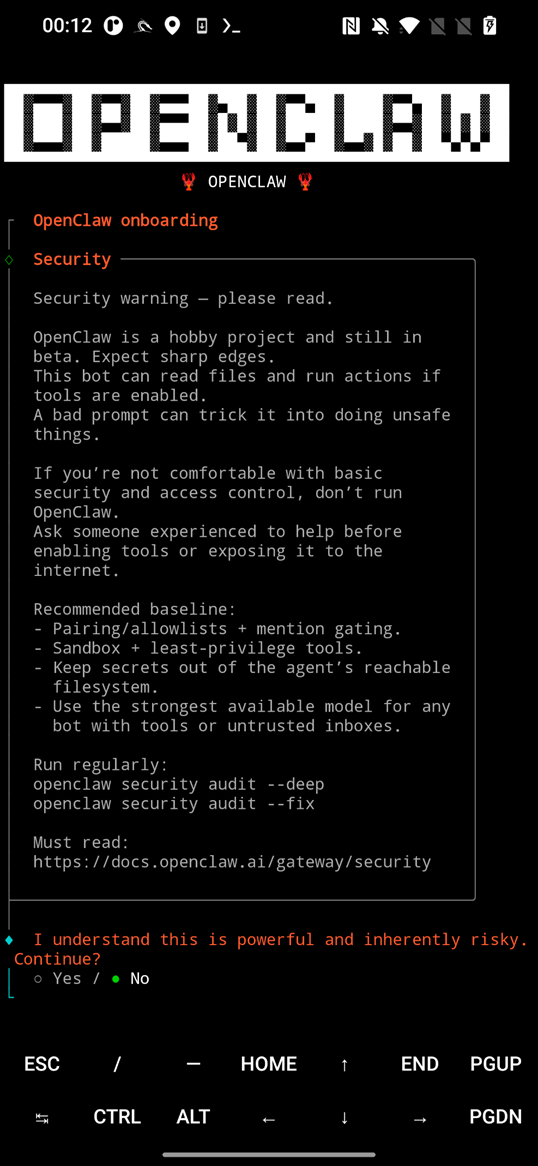
Once finished, you may need to Ctrl + C, even when you see Onboarding complete, gateway will be launched. Open browser and http://localhost:18789, see Figure 2 below.
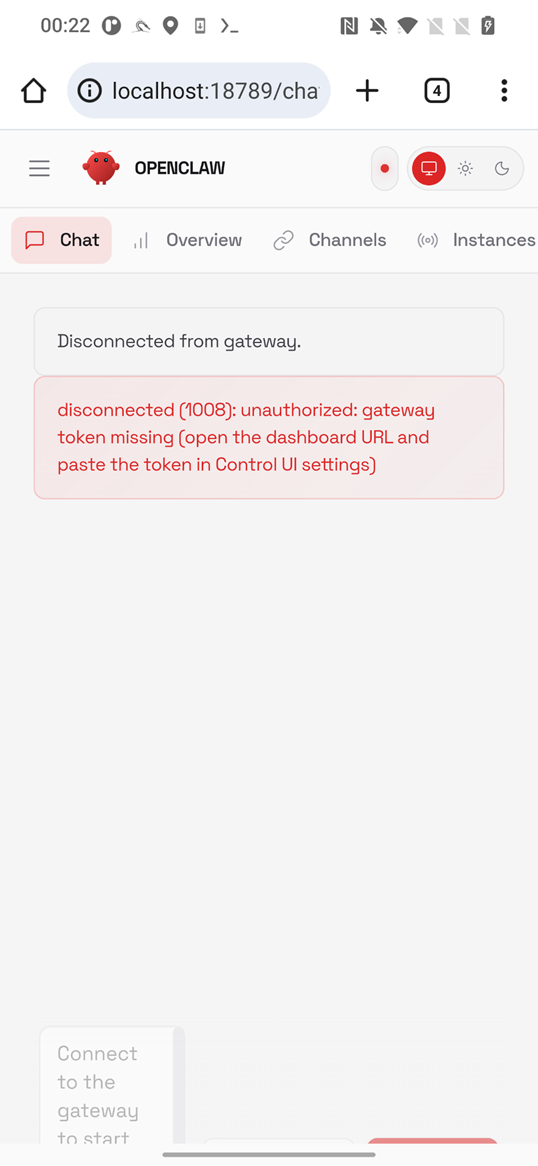
Gateway is disconnected, so first we have to enter gateway token that is stored in openclaw.json. Open new Termux terminal, make sure you are logged in Ubuntu (proot-distro login ubuntu), and display the json using cat ~/.openclaw/openclaw.json. Find the token, and copy it, as displayed in Figure 3 below.
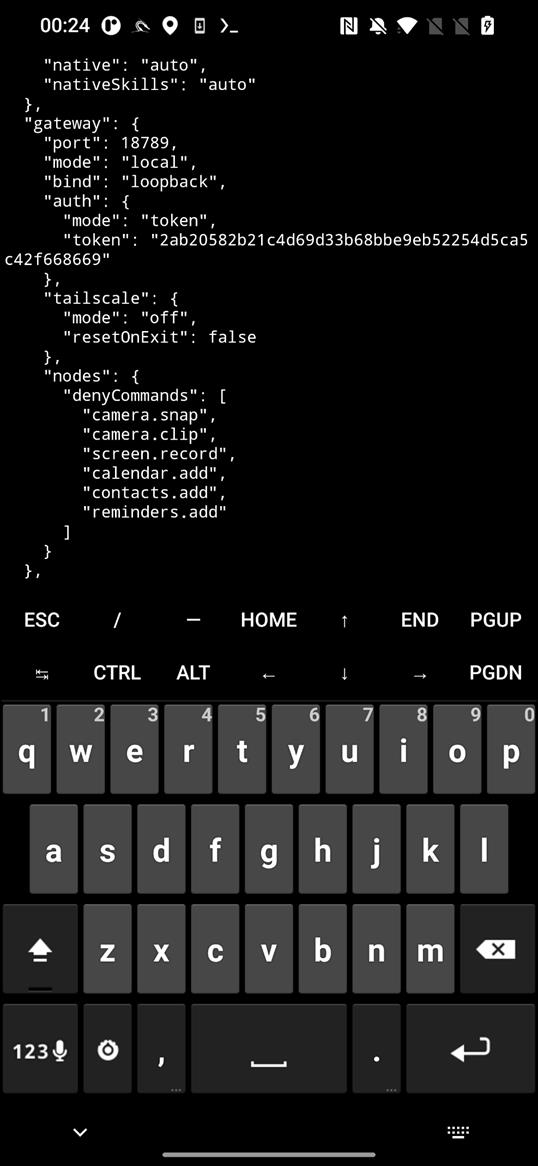
~/.openclaw/openclaw.json filePaste it into Gateway → Overview → Gateway Access → Gateway Token in the web UI and tap on Connect button as in Figure 4.
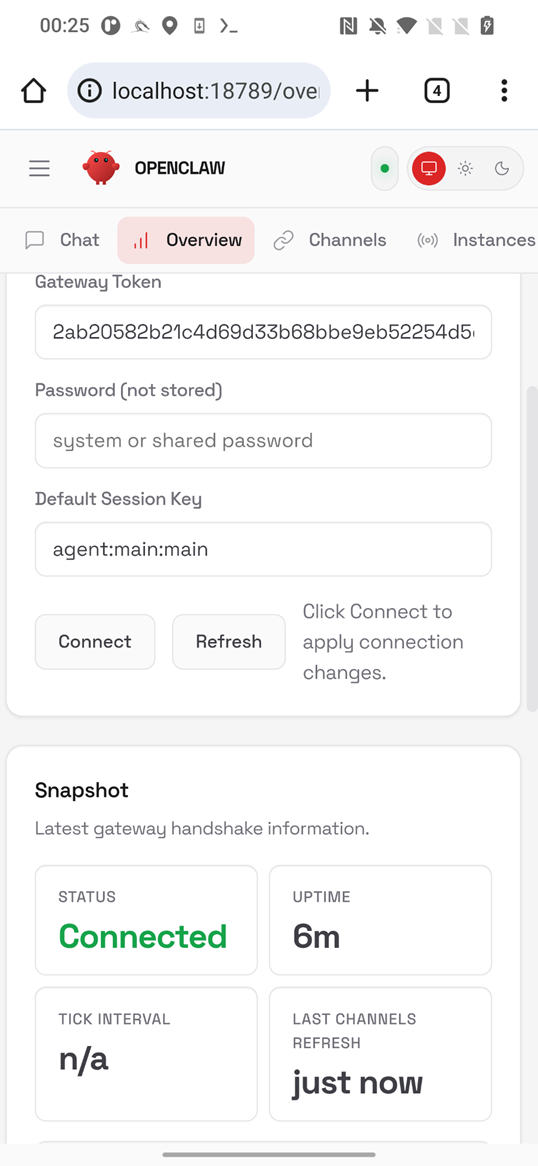
Your OpenClaw gateway is successfully running on your Android smartphone.
If you need to change initial settings later, re‑run the wizard using openclaw onboard and start the gateway using openclaw gateway –verbose.
Troubleshooting
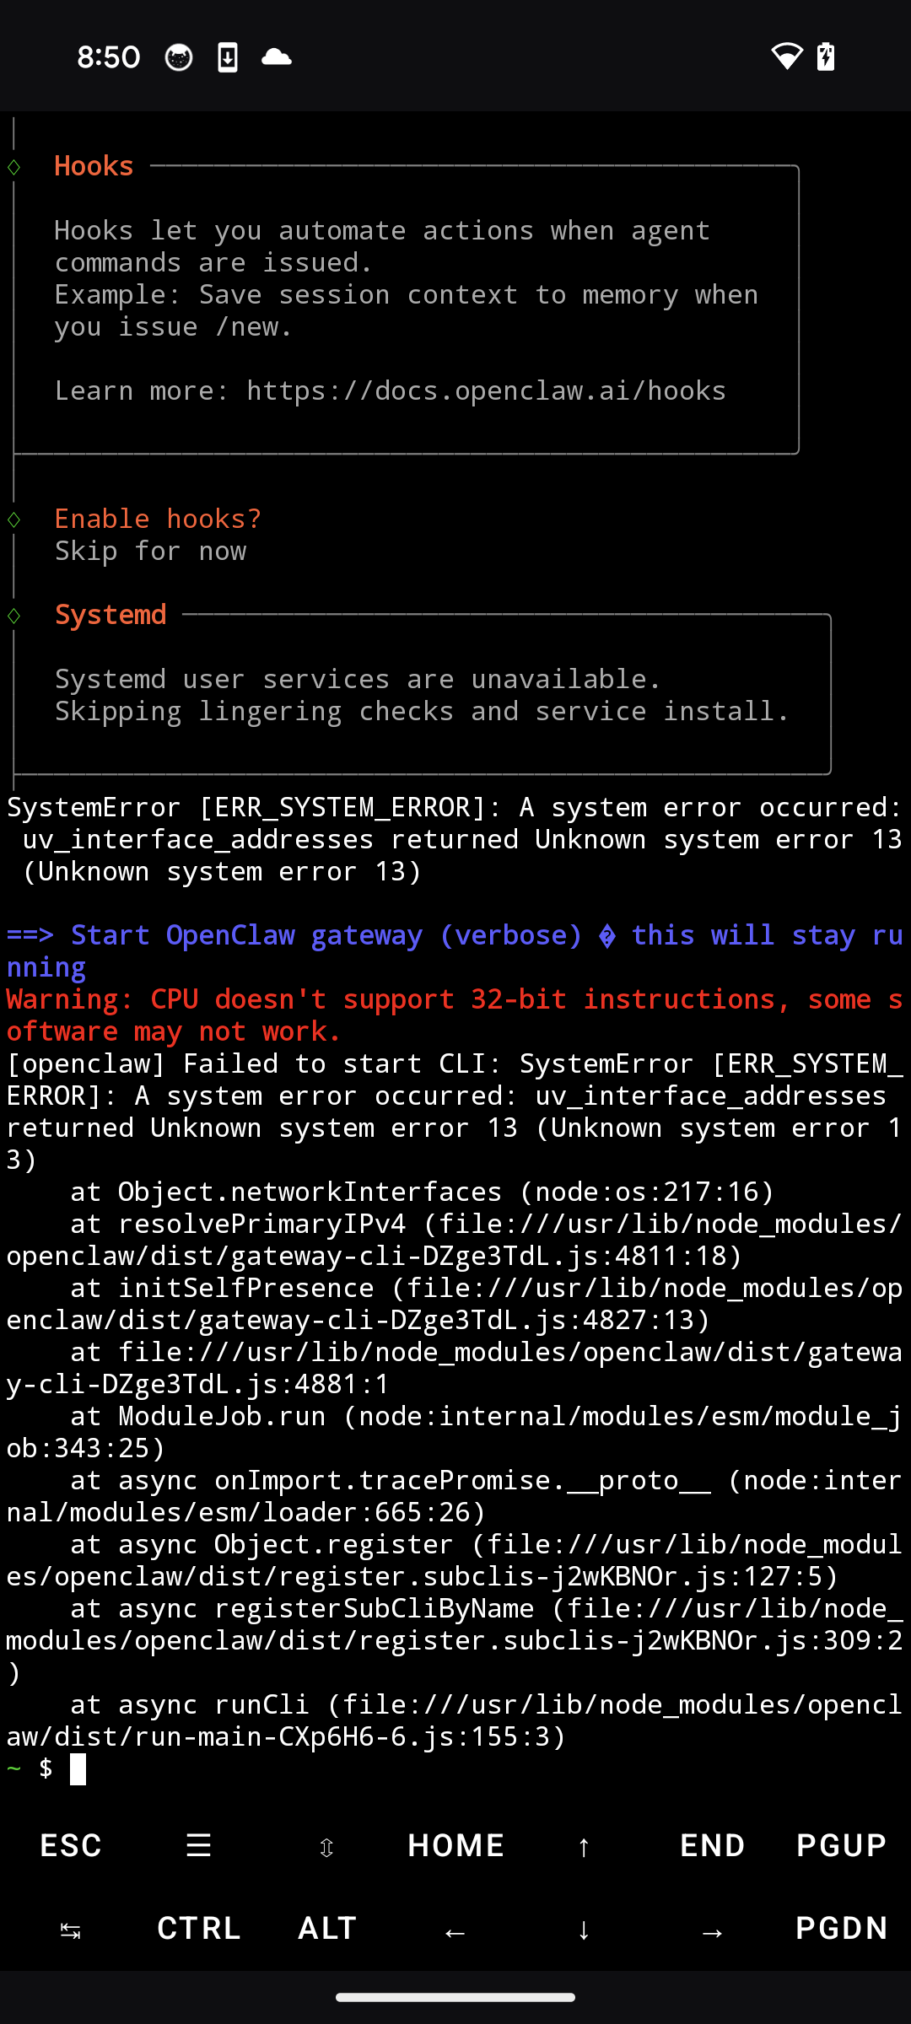
I experienced one error while opening openclaw, see Figure 5. To fix it, I just re-run the gateway by loging into ubuntu (proot-distro login ubuntu) and starting a gateway (openclaw gateway --verbose).
Connecting chat channels
OpenClaw’s wizard can pair your messaging channels so you can text your agent from your pocket:
- WhatsApp: QR‑login flow.
- Telegram: your bot token + pairing.
- Discord: bot token + guild/channel setup.
Using Gemini CLI on the free tier
I use Gemini CLI with Login with Google (OAuth), the docs call out a personal-account free tier (e.g., ~60 req/min, ~1,000/day) and a simple browser login flow. You can also use an API key from Google AI Studio if you prefer.
If you want to use it, you first need to install gemini CLI in ubuntu terminal.