Equipped with an integrated module, Flipper Zero is capable of both receiving and transmitting radio frequencies spanning from 300 MHz to 928 MHz. This module enables to capture, store, and replicate remote controls, commonly employed for tasks such as interfacing with gates, radio locks, remote switches, wireless doorbells, etc.
By default, Flipper Zero uses internal radio module with low power, covering smaller area. Fortunately, we can increase the range of reception and transmission of the radio signal using an external radio module such as CC1101 with removable antenna. In this blog, I will show you how to extend range of your Flipper Zero yourself in few easy steps to send radio signal from up to 100 meters.
External CC1101 radio module
CC1101 is a low-cost sub-1 GHz transceiver designed for very low-power wireless applications. Typically, it is used in conjunction with a microcontroller and a few other passive components in a typical system. The module supports frequency bands ranging from 300-348 MHz, 387-464 MHz, and 779-928 MHz.
Implementation
This project is easy to accomplish. Besides Flipper Zero, we need СС1101 module, male to female jumper wires. In case you would like to make it even more powerful, you can use 12dBi antenna with SMA male connector. Make sure not to buy 2.4GHz antenna that is used for Wi-Fi or Bluetooth, and not compatible on lower radio frequencies like we need.

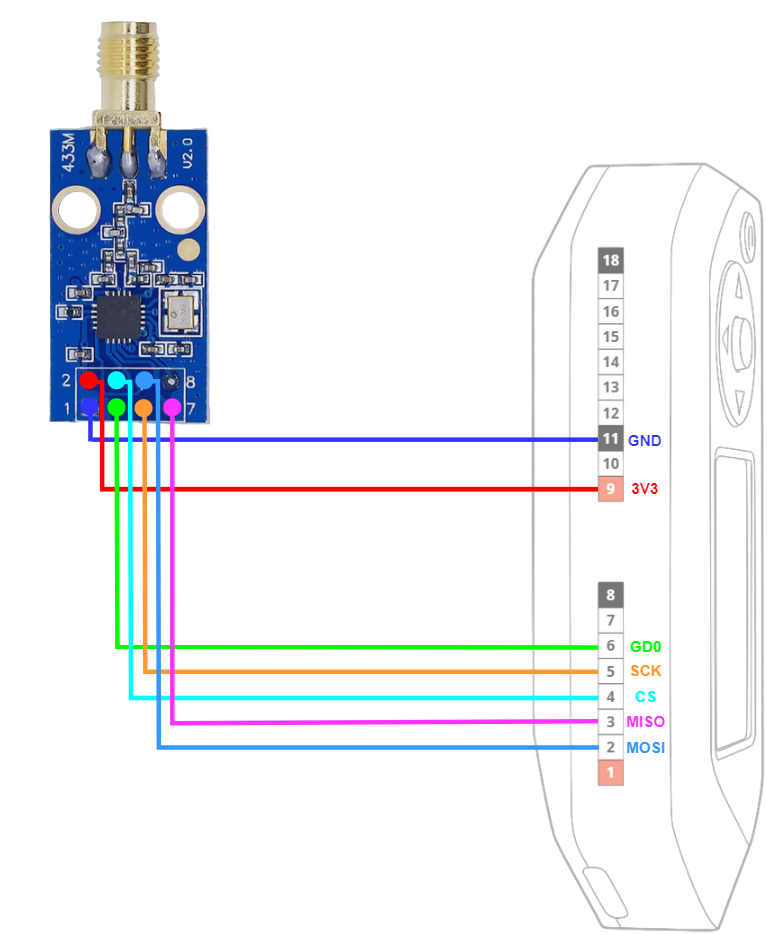
Our goal is to correctly connect CC1101 module using wires with Flipper Zero. For that, we need seven cables that are connected to specific pins, you can see the scheme in the Figure 2. This scheme is available on quen0n’s GitHub.
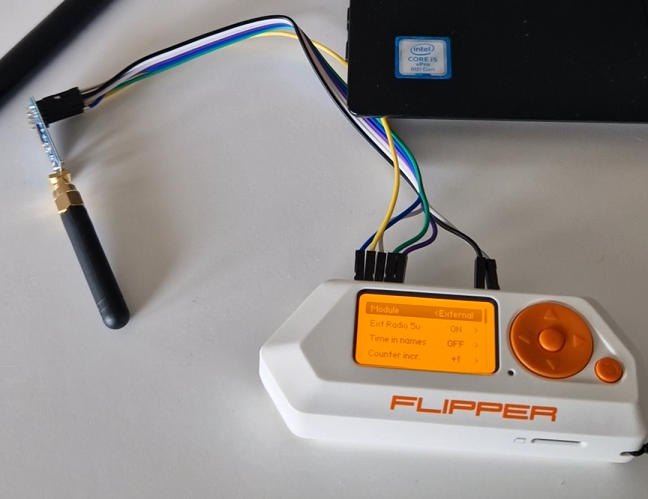
Once successfully connected, it should look something like in Figure 3. By default, if you connect external CC1101 module, it should be automatically recognized and enabled by Flipper Zero. However, to make sure, you can check which radio module is in use by going to Sub-GHz -> Radio Settings -> Module. From Module menu, you can switch from Internal to External module.
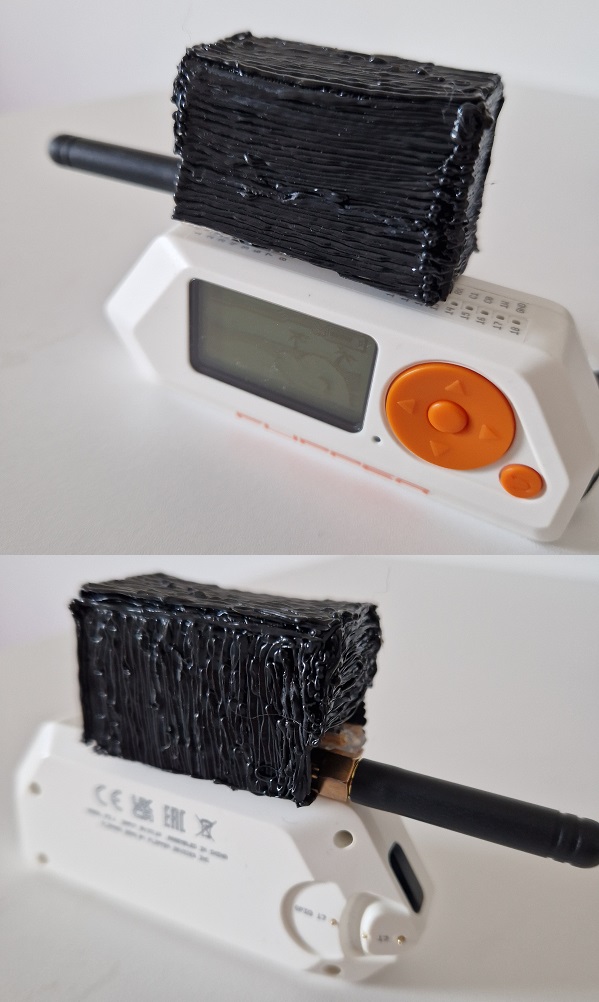
This doesn’t look very portable, so I decided to short the cables and fix them on specific pin positions with skewers using hot glue gun. It looks terrible, see Figure 4.
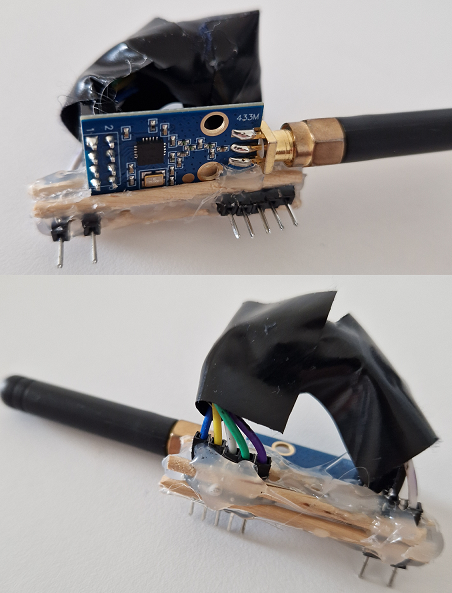
On top of that, I used 3-D pen printed case as you can see in Figure 5. It doesn’t look great, but it is stable.
Now it is time to test the module and see the differences. In the video below, I used built-in radio module to copy frequency of my parking gate from around 80 meters. Gate receiver wasn’t able to get the signal. Then I plugged CC1101 and coped raw signal again. This time gate successfully opened. I was able to replicate these results from up to 100 meters. Unfortunately, I wasn’t able to extend tested range, since the parking lot has its space (walls) limits. These tests were performed using “in package” 2dBi antenna without even touching 12 dBi antenna.
Conclusion
In conclusion, using an external CC1101 radio module can significantly improve the range of reception and transmission of the radio signal using your Flipper Zero device. It is a great option for those who require a longer working distance and more customization options.
This was a quick, cheap, and easy to DIY tutorial on how to increase radio range of your Flipper device using external radio module.

Hey I found your discord server invite url from your linktree (https://linktr.ee/mobilehacker). But unfortunately, it is expired. Could you please renew it?
Weird, it should not expire. You can try this one: https://discord.com/invite/ByrVsEvVTg
Where can I purchase a flipper 0